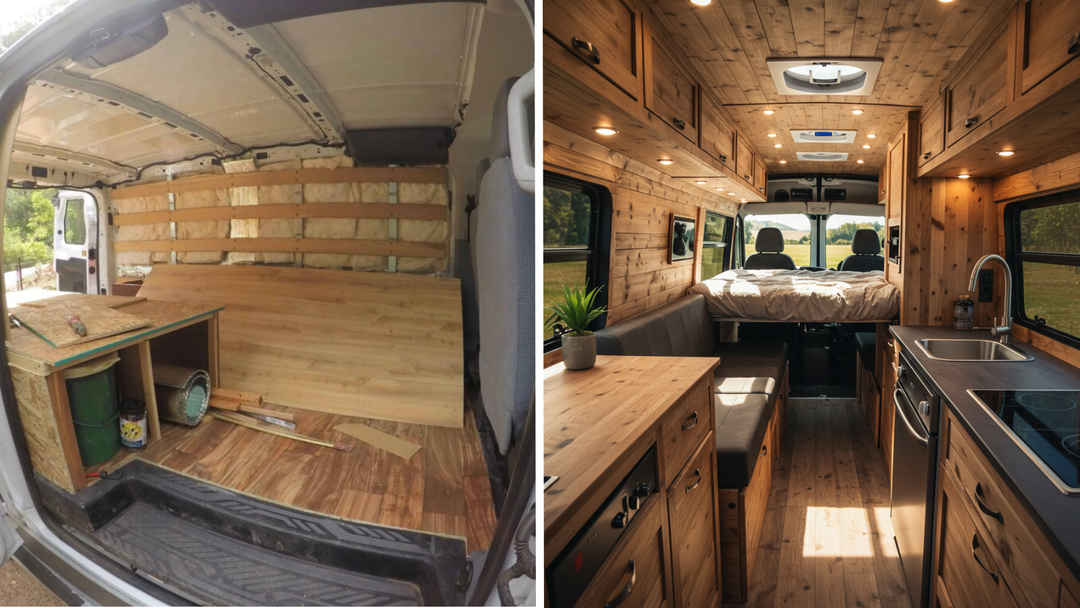
How to Build a Bed System in a Sprinter Van: A Practical Guide for Space-Smart Builders
Building Your Bed is the Backbone of the Entire Van Layout
Ask any van builder—DIY or pro—and they’ll tell you: get the bed wrong, and everything else becomes harder. The bed dictates storage, seating, kitchen space, and even how you move around inside your van.
This guide walks you through how to build a smart, comfortable, and space-efficient bed system specifically for a Mercedes Sprinter van. Whether you're going fixed platform, convertible, or garage layout, you’ll get real insights from builders who’ve done it all.
Step 1: Choose Your Bed Layout
There’s no one-size-fits-all solution, but here are the most common setups:
🛏 Fixed Platform Bed

-
Bed doesn’t move; typically raised to allow gear storage underneath
-
Great for full-timers, bikers, or anyone who needs garage space
-
Cleaner install, fewer moving parts
Best For: People with lots of gear or who value simplicity
🪑 Convertible (Bench or Dinette Style)

-
Transforms from couch or dining setup into bed
-
Maximizes living space during the day
Best For: Weekend warriors, digital nomads, people who like flexibility
🧰 Slide-Out or Slat Bed

-
Pulls out when needed, retracts when not in use
-
Great balance between comfort and modularity
Best For: Builders with unique floor plans or part-time travelers
Step 2: Know Your Van's Dimensions
A Mercedes Sprinter (170” or 144” wheelbase) gives you options—but you’ve got to work around the realities:
-
Interior width at bed height: ~70"
-
After insulation + wall framing: closer to 65"
-
If you’re sleeping sideways: you’ll probably need capsules or flares to get full stretch
Builder Tip: Before framing anything, mock up your layout with cardboard, tape, or wood framing. You'll catch clearance issues before they become real problems.
Step 3: Plan for Sleeping Capsules or Flares (If Needed)
If you plan to sleep sideways (east-west), you’ll need a little more width than most Sprinters allow.
Flares or Capsules Can Help:
-
Flares add extra exterior width at bed height

-
Capsules or inset sleepers (like window cavity trim-outs) offer a low-profile alternative

Product Tip: If you're going with flares, use our Sprinter Flare Trim Rings. They feature adjustable sill height, so you can match the window trim to your custom bed height—something most builders forget to plan for.
That adjustment flexibility = cleaner fit, better insulation, and a more finished look.
Step 4: Frame and Anchor the Bed Safely
No matter which layout you choose, the frame needs to be:
-
Level side-to-side
-
Properly anchored to the van’s walls or floor (no floating beds!)
-
Built to support weight—use 2x4s or 80/20 aluminum depending on your skill level
Builder Tip: Use factory bolt points where possible to anchor the bed. Avoid drilling through the van floor unless you have to—it adds sealing and rust-proofing steps.
Step 5: Pick the Right Height
This is where a lot of DIYers get it wrong.
-
Too high: hard to sit up or feels cramped
-
Too low: you lose garage space underneath
General Guidelines:
-
Minimum under-bed clearance for bikes: 36–40"
-
Comfortable bed platform height: ~36–38"
Builder Tip: Use cardboard boxes or adjustable sawhorses to test sleep height before you build. What feels “fine” standing might feel claustrophobic lying down.
Step 6: Choose Your Mattress Setup
Your mattress is the last thing you want to cheap out on. Options:
-
Full-size memory foam (cut to fit)
-
Custom RV mattresses (cost more, fit perfectly)
-
Modular cushions for convertible or bench beds
Builder Tip: For fixed beds, round the corners of your mattress to make sheet fitting easier and reduce tight squeezes in narrow layouts.
Bonus: Integrate with Your Trim
Once the bed is in place, you want the walls and trim to flow with it. If you're using flares, this is crucial.
✅ Again, this is where the Sprinter Flare Trim Ring shines. The adjustable sill height lets you align the ring cleanly with the top edge of your mattress—reducing gaps, airflow loss, and awkward trim work.

Builder Tip: Install your window trim after mocking up your bed height—not before. You'll save yourself hours of rework.
Final Thoughts
Your bed system isn’t just where you sleep—it’s the foundation for the entire van layout. Get it right, and everything else clicks into place. Measure twice, build once, and plan smart around your dimensions.
If you’re integrating flares or trim, choose parts that match your actual bed height—not just generic cuts. It’s one of the most overlooked decisions in van building.
✅ Want to see how bed layout ties into sleeping capsules? Check out our full guide: Sleeping Capsules for Vans
Build solid. Sleep smarter. Travel farther.
– The GoCode Team


